Putting a card on file takes about two minutes and is what lets BloomLine bill your usage automatically at the flat $1.50 per minute rate. You set it up once through Stripe Checkout, and from then on you manage everything - card, invoices, details - in the Stripe customer portal. Here is the full walkthrough.
Put a card on file
- Sign in and open Shop settings, then pick the Plan & billing tab (/dashboard/shop?tab=plan).
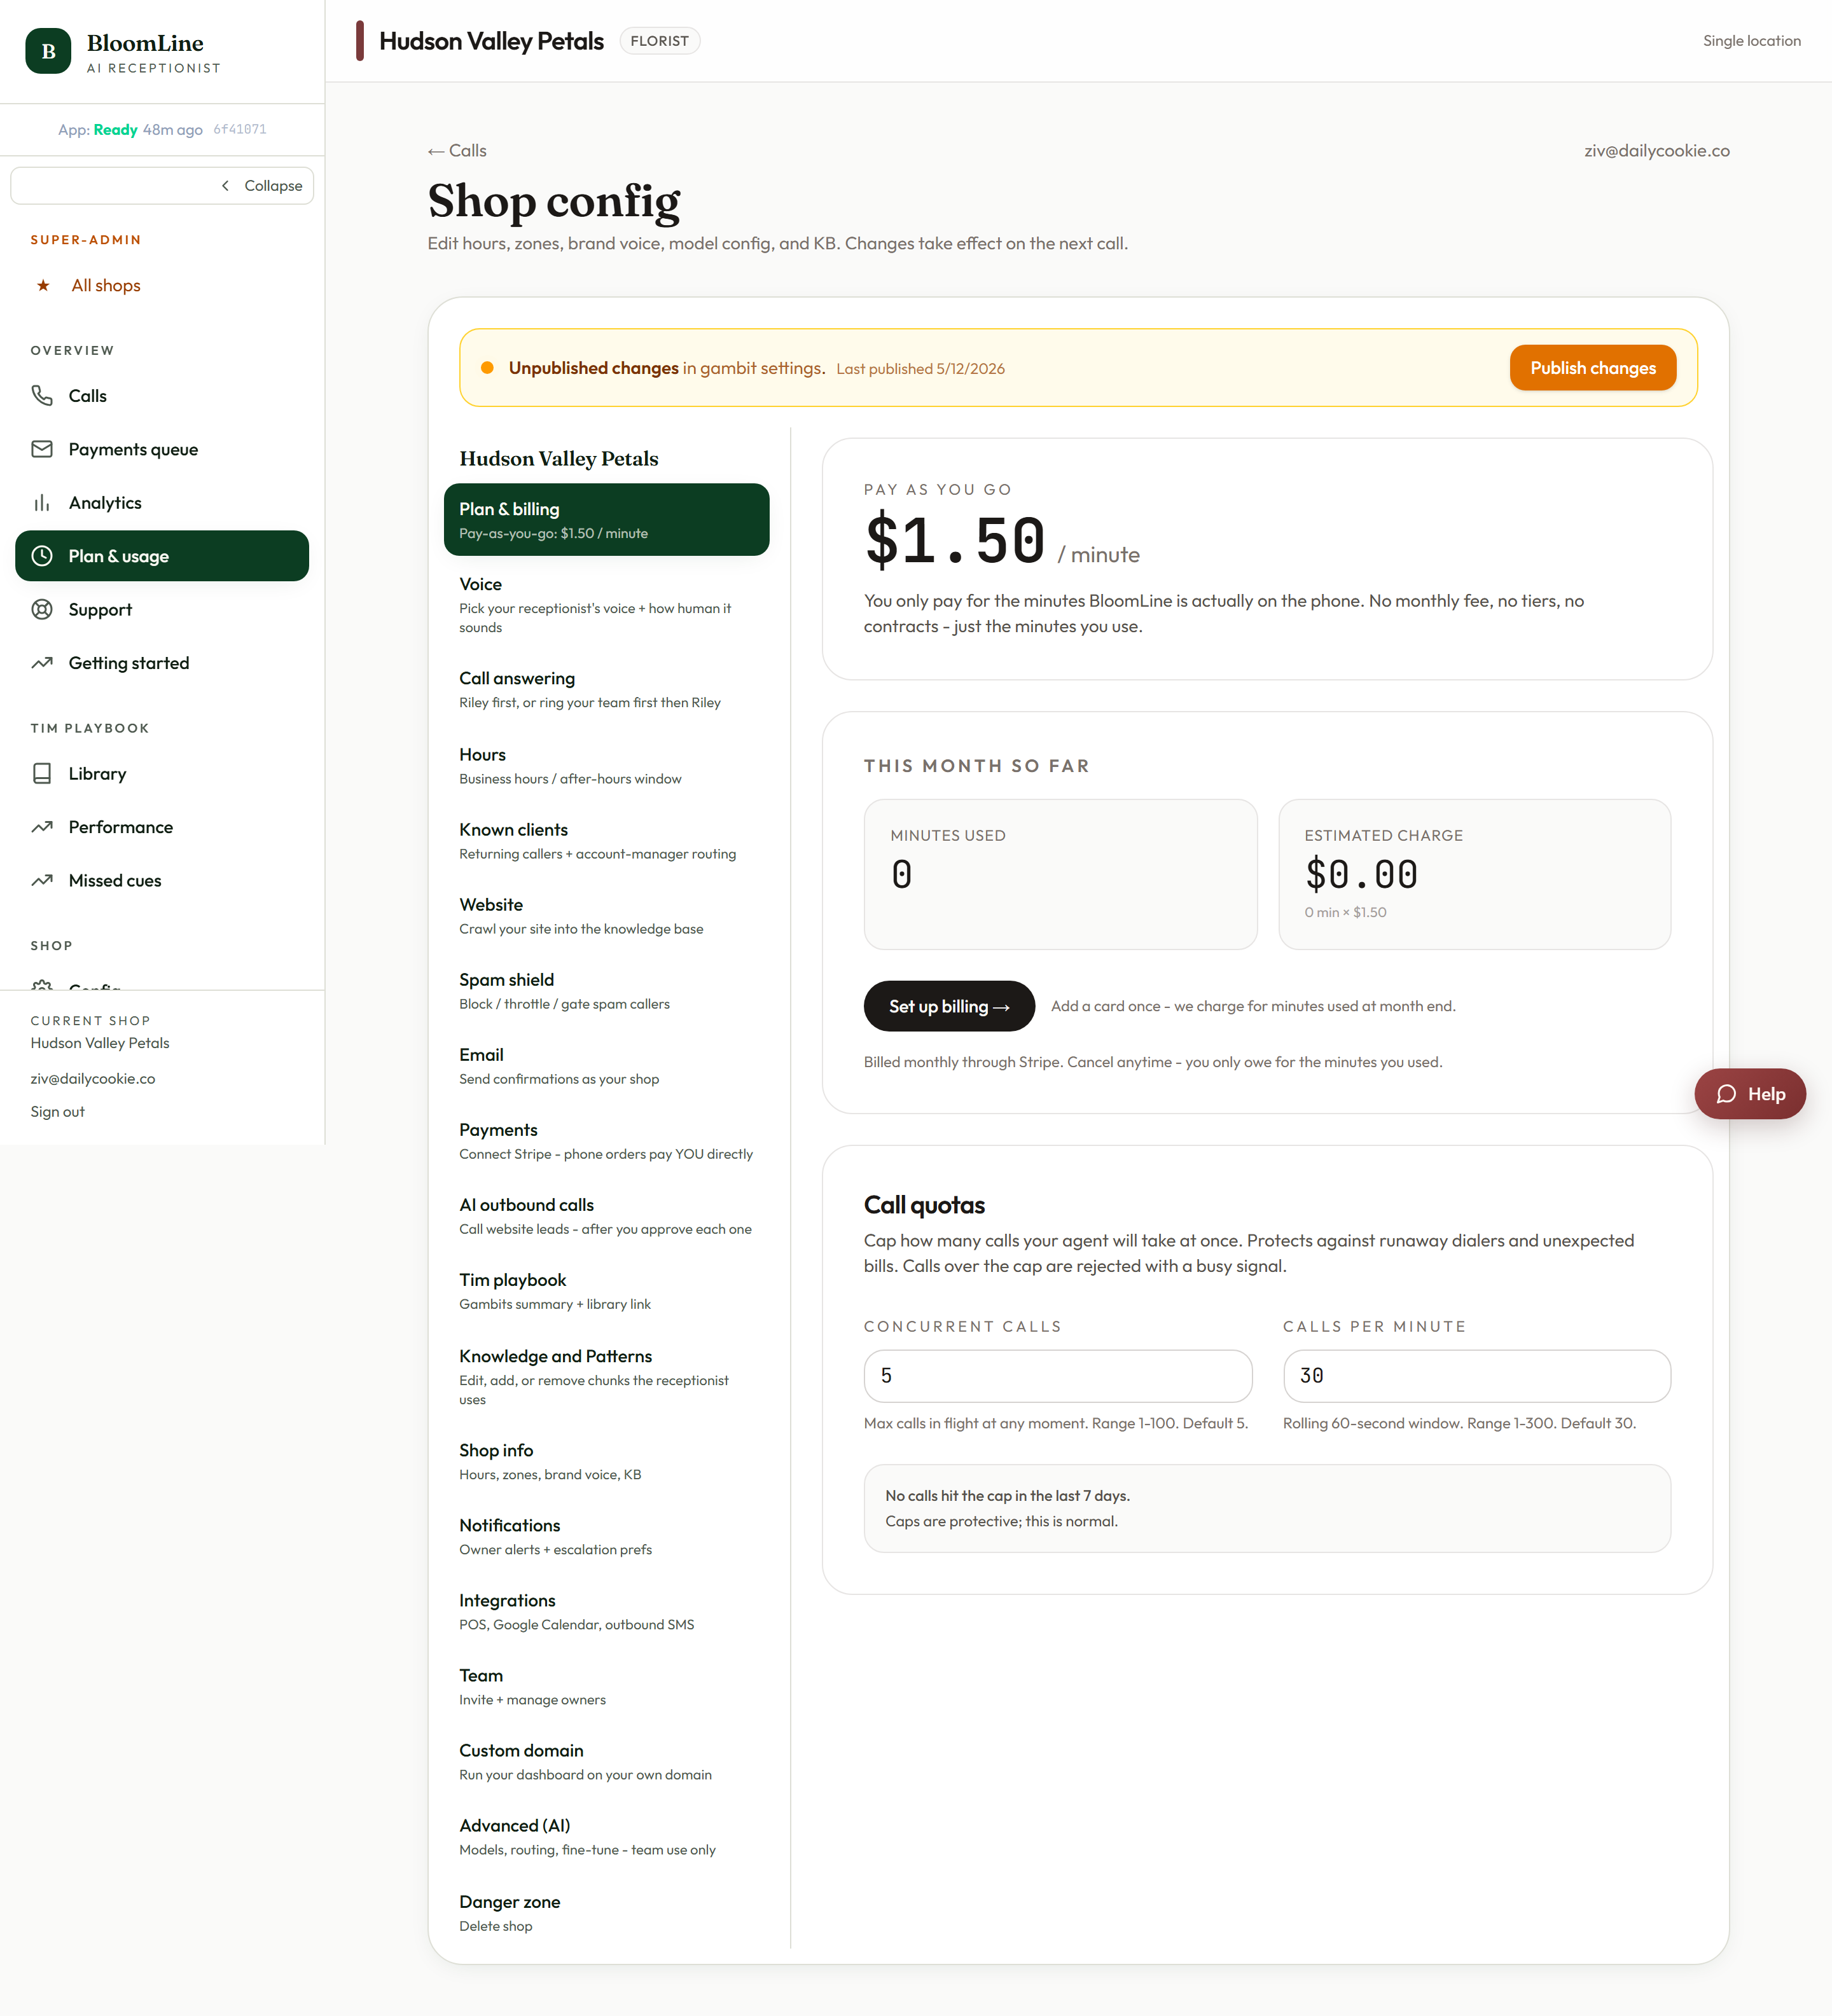
- Click Set up billing. This opens Stripe Checkout for a usage-based plan.
- Enter your card in Stripe Checkout and complete the flow. Your card is now on file, and usage is billed monthly based on the minutes Riley handles.
Confirm it worked: the Billing active chip
Back on the Plan & billing tab, look for the Billing active status chip. When it appears, your card is on file and everything is wired up - the tab's Minutes used this month and Estimated charge stats show exactly what will be billed as the month progresses.
Manage your card and invoices later
Whenever you need to swap a card, update details, or review charges, click Manage billing on the same tab. It opens the Stripe customer portal, where all card and invoice management happens. You never need to email anyone to change a card.
Call quotas on the same tab
Below the billing controls, the Plan & billing tab also holds two quota fields that put a ceiling on call volume:
- Calls per minute - caps how many new calls can come in each minute.
- Concurrent calls - caps how many calls Riley handles at the same time.
These act as guardrails on usage, which also means guardrails on cost. Most shops can leave the defaults alone, but if you ever want a hard limit on how fast minutes can accumulate, this is where you set it.
The Billing agreement step in the Setup Assistant
If you're still working through the Setup Assistant (/dashboard/setup), billing has its own step in the wizard. The Billing agreement step asks for your billing email and has you confirm the plan and the card on file. Like every wizard step, it saves itself and checks off on the step rail once complete, so you can see at a glance that billing is squared away alongside the rest of your setup.
One thing this is not: customer payments
Don't confuse the Plan & billing tab with the Payments tab. Plan & billing is the card BloomLine charges you for usage. The Payments tab (/dashboard/shop?tab=payments) is where you connect your shop's own Stripe key so that mid-call payment links from customers pay your shop directly. Two different Stripe connections, two different jobs.
Still stuck? Submit a ticket from this help center and we'll take it from there.
Was this article helpful?
That’s Great!
Thank you for your feedback
Sorry! We couldn't be helpful
Thank you for your feedback
Feedback sent
We appreciate your effort and will try to fix the article