If you run more than one flower shop, you can manage all of them from a single BloomLine login. Each location gets its own receptionist setup, and a shop switcher in the dashboard header lets you flip between them in one click. Adding a location takes just a few minutes because it reuses the same website-scan wizard you used when you first signed up.
Add a second location
The Add location link lives in the Shop section of the dashboard sidebar, right alongside Config, Opening line, Fine-tune, Mystery shop, and Recordings.
- In the sidebar, scroll to the Shop section and click Add location. This opens the website-scan wizard, the same flow new shops use to onboard.
- Enter the new location's website address (for example, https://yourflowershop.com) and click Scan my shop. You'll see live progress while BloomLine reads the site.
- Review what the scan found: the shop name, brand voice, and the emails BloomLine will use (a you@ address and an orders@ address).
- Check the delivery zones. Each row has a zone and a fee, and you can add or remove rows so they match the new location's actual delivery area.
- Check the products and services rows (name, price, description) and the specialty tags, such as Wedding flowers, Sympathy, or Same-day delivery.
- Click the create shop button. The done screen then points you to the Setup Assistant so you can finish setting up the new location, including its email identity.
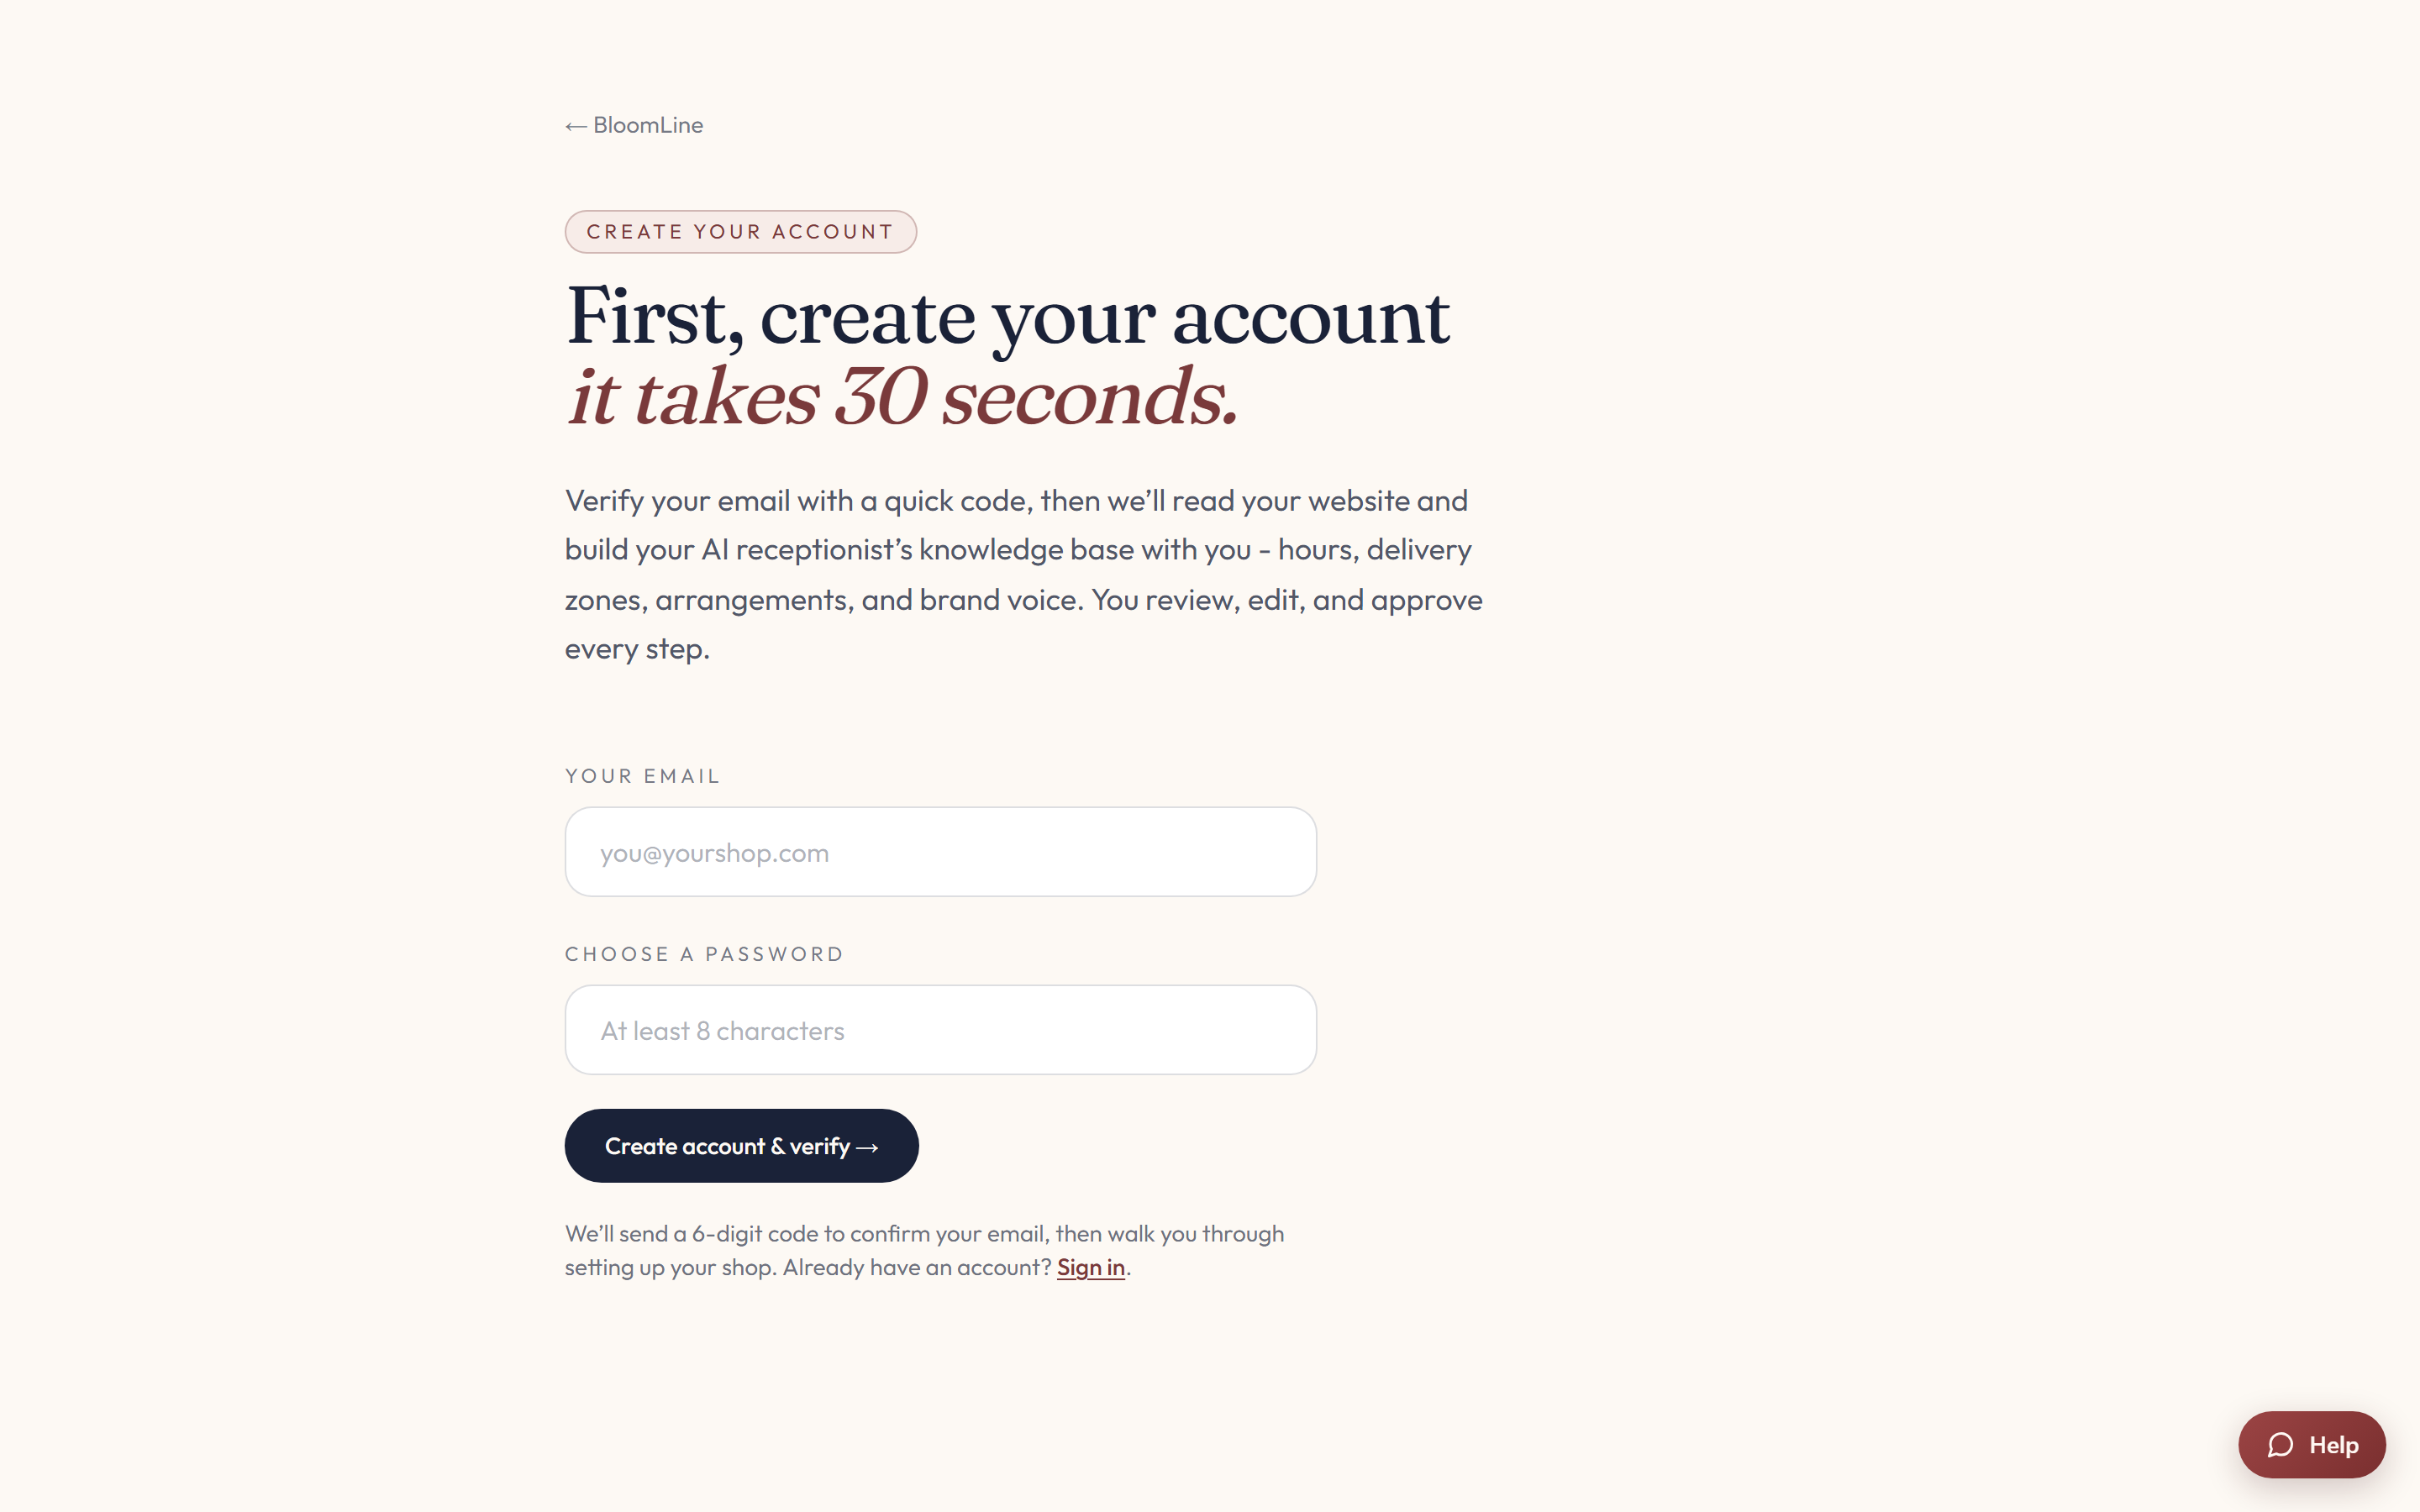
The new shop is automatically linked to your sign-in email, so it appears under your account the next time you log in.
Switch between shops
Once you have more than one location, use the shop switcher in the dashboard header:
- Look at the top of any dashboard page. With one shop, the switcher reads Single location. With two or more, it shows Switch.
- Click it to open the dropdown listing your shops.
- Pick the shop you want to work on. The dashboard now shows that location's data.
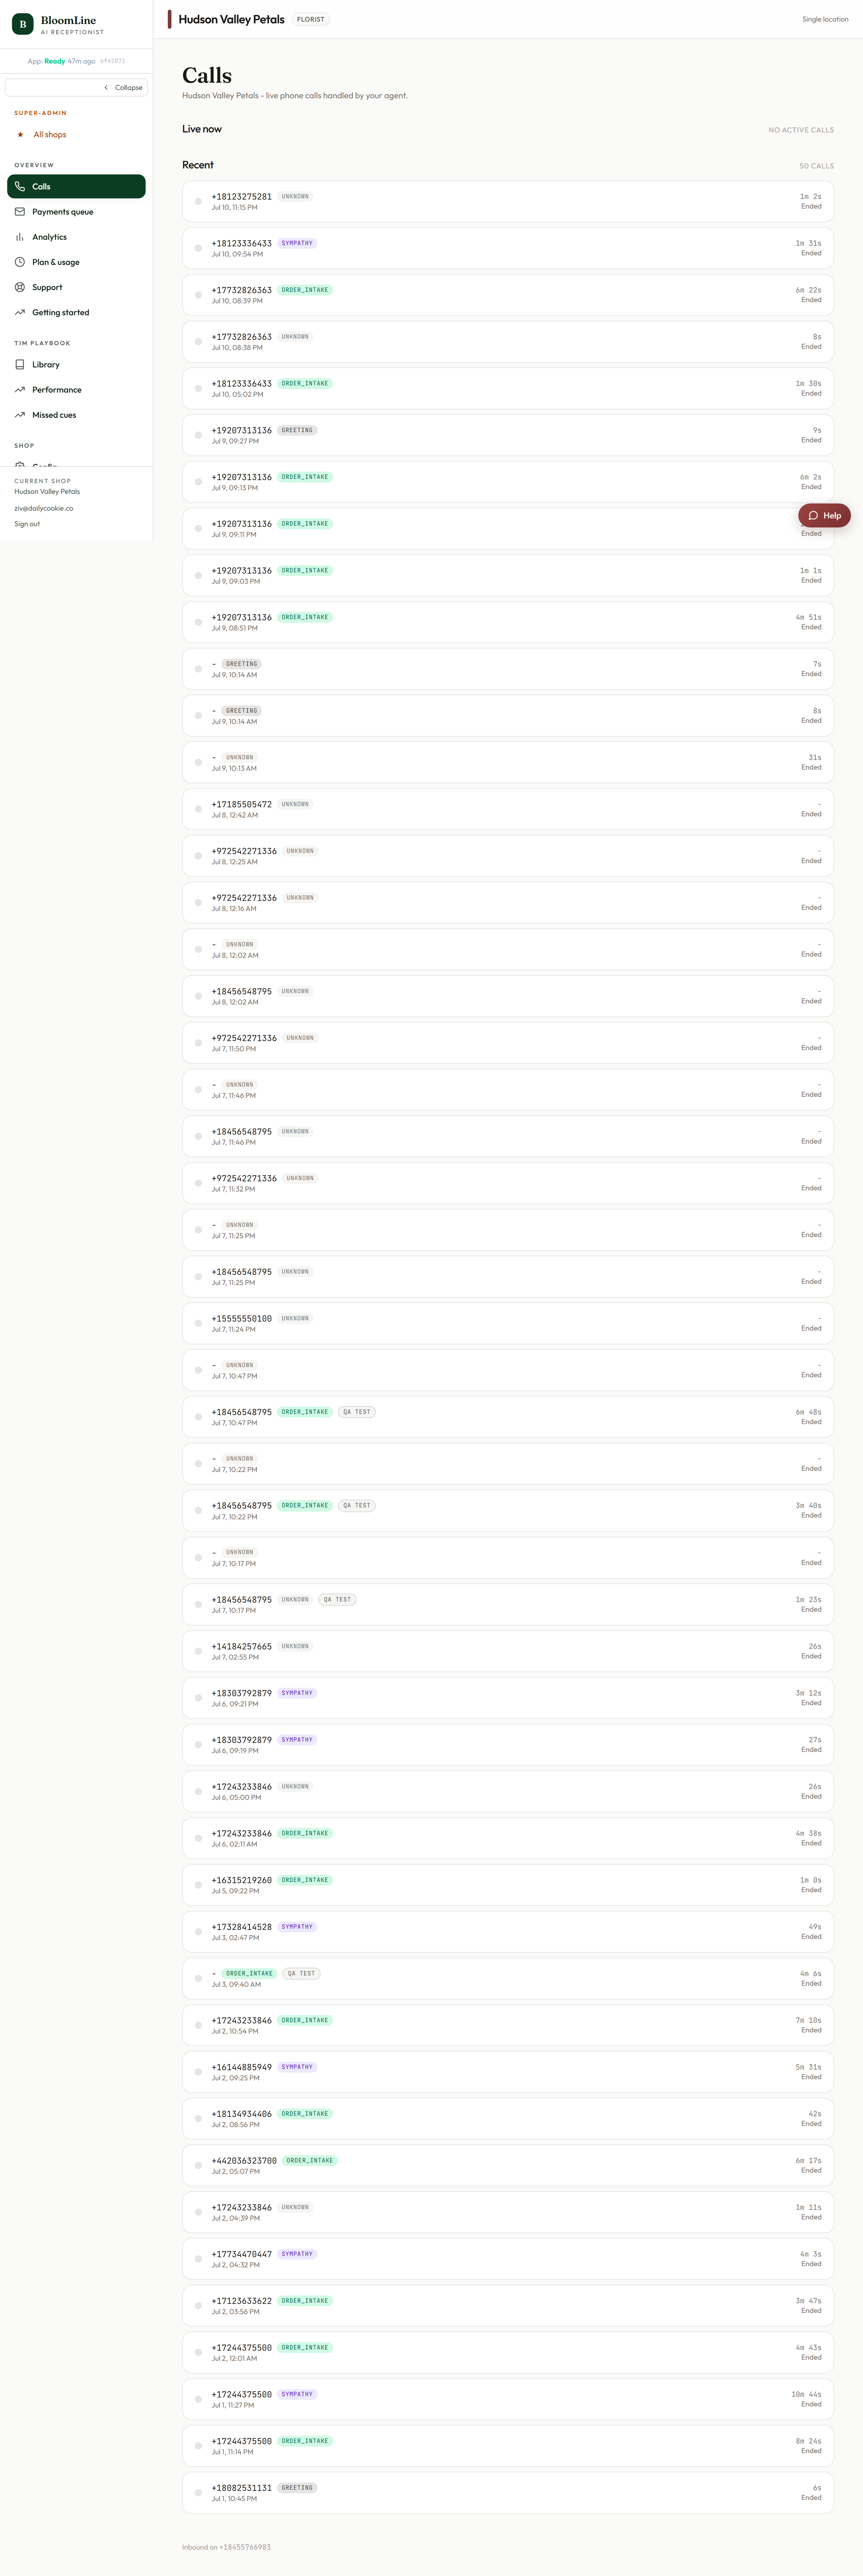
What switching changes
The dashboard always shows one active shop at a time. That means everything you see and edit belongs to the location currently selected in the switcher:
- The calls list, call details, and recordings
- Shop configuration, the opening line, and the Tim Playbook
- Mystery shop scenarios and fine-tune training
Before changing a setting, glance at the header to confirm you're on the right shop. It's the easiest way to avoid editing the wrong location's greeting or delivery zones.
Still stuck? Submit a ticket from this help center and we'll take it from there.
Was this article helpful?
That’s Great!
Thank you for your feedback
Sorry! We couldn't be helpful
Thank you for your feedback
Feedback sent
We appreciate your effort and will try to fix the article